Friday, December 2, 2022

Rustic Wood Star

 I just got the new Papertrey Ink "Rustic Wood Star" dies and I love their country look. I fell in love with them after seeing Kelly Lunceford's beautiful card. 


Here are the Distress Oxide inks that I used:

Star: Antique Linen, Brushed Corduroy, Gathered Twigs, Vintage Photo

Wreath: Frayed Burlap, Ground Espresso, Vintage Photo

Brick: Ground Espresso brush over some of the bricks

Leaves: Rustic Wilderness, Mowed Lawn 


OTHER SUPPLIES:

Paper: White, black, Kraft, Cherry Cobbler, Handsome Hunter (SU), Autumn Chicken Scratch Gingham (pti)

Ink: DOX - see below

Dies: Rustic Wood Star, Nesting Basic: Ovals, Nesting:Pierced Ovals (pti); Perfect Sentiments: Holiday (Pinkfresh Studio)

Other: Brick & Mortar 3D embossing folder, Pinewood Plank 3D embossing folder (SU); white ink for splatters

Hot foil plate: Perfect Sentiments: Holiday  (Pinkfresh Studio)

Hot Foil: Red (Spellbinders)


Sunday, November 13, 2022

Warm & Wonderful Hot Cocoa

 This is a birthday card for a friend. The birthday sentiment is on the inside of the card.


I experimented with inks for the cup and found the following to work best for me:

Cup outline detail: Dove (C9)


A1: Warm Buff (Pinkfresh Studio)

A2: Doe (PFS)

A3: Gathered Twigs (PFS) - stamp off one time first


Cream:

Warm Buff & Gathered Twigs

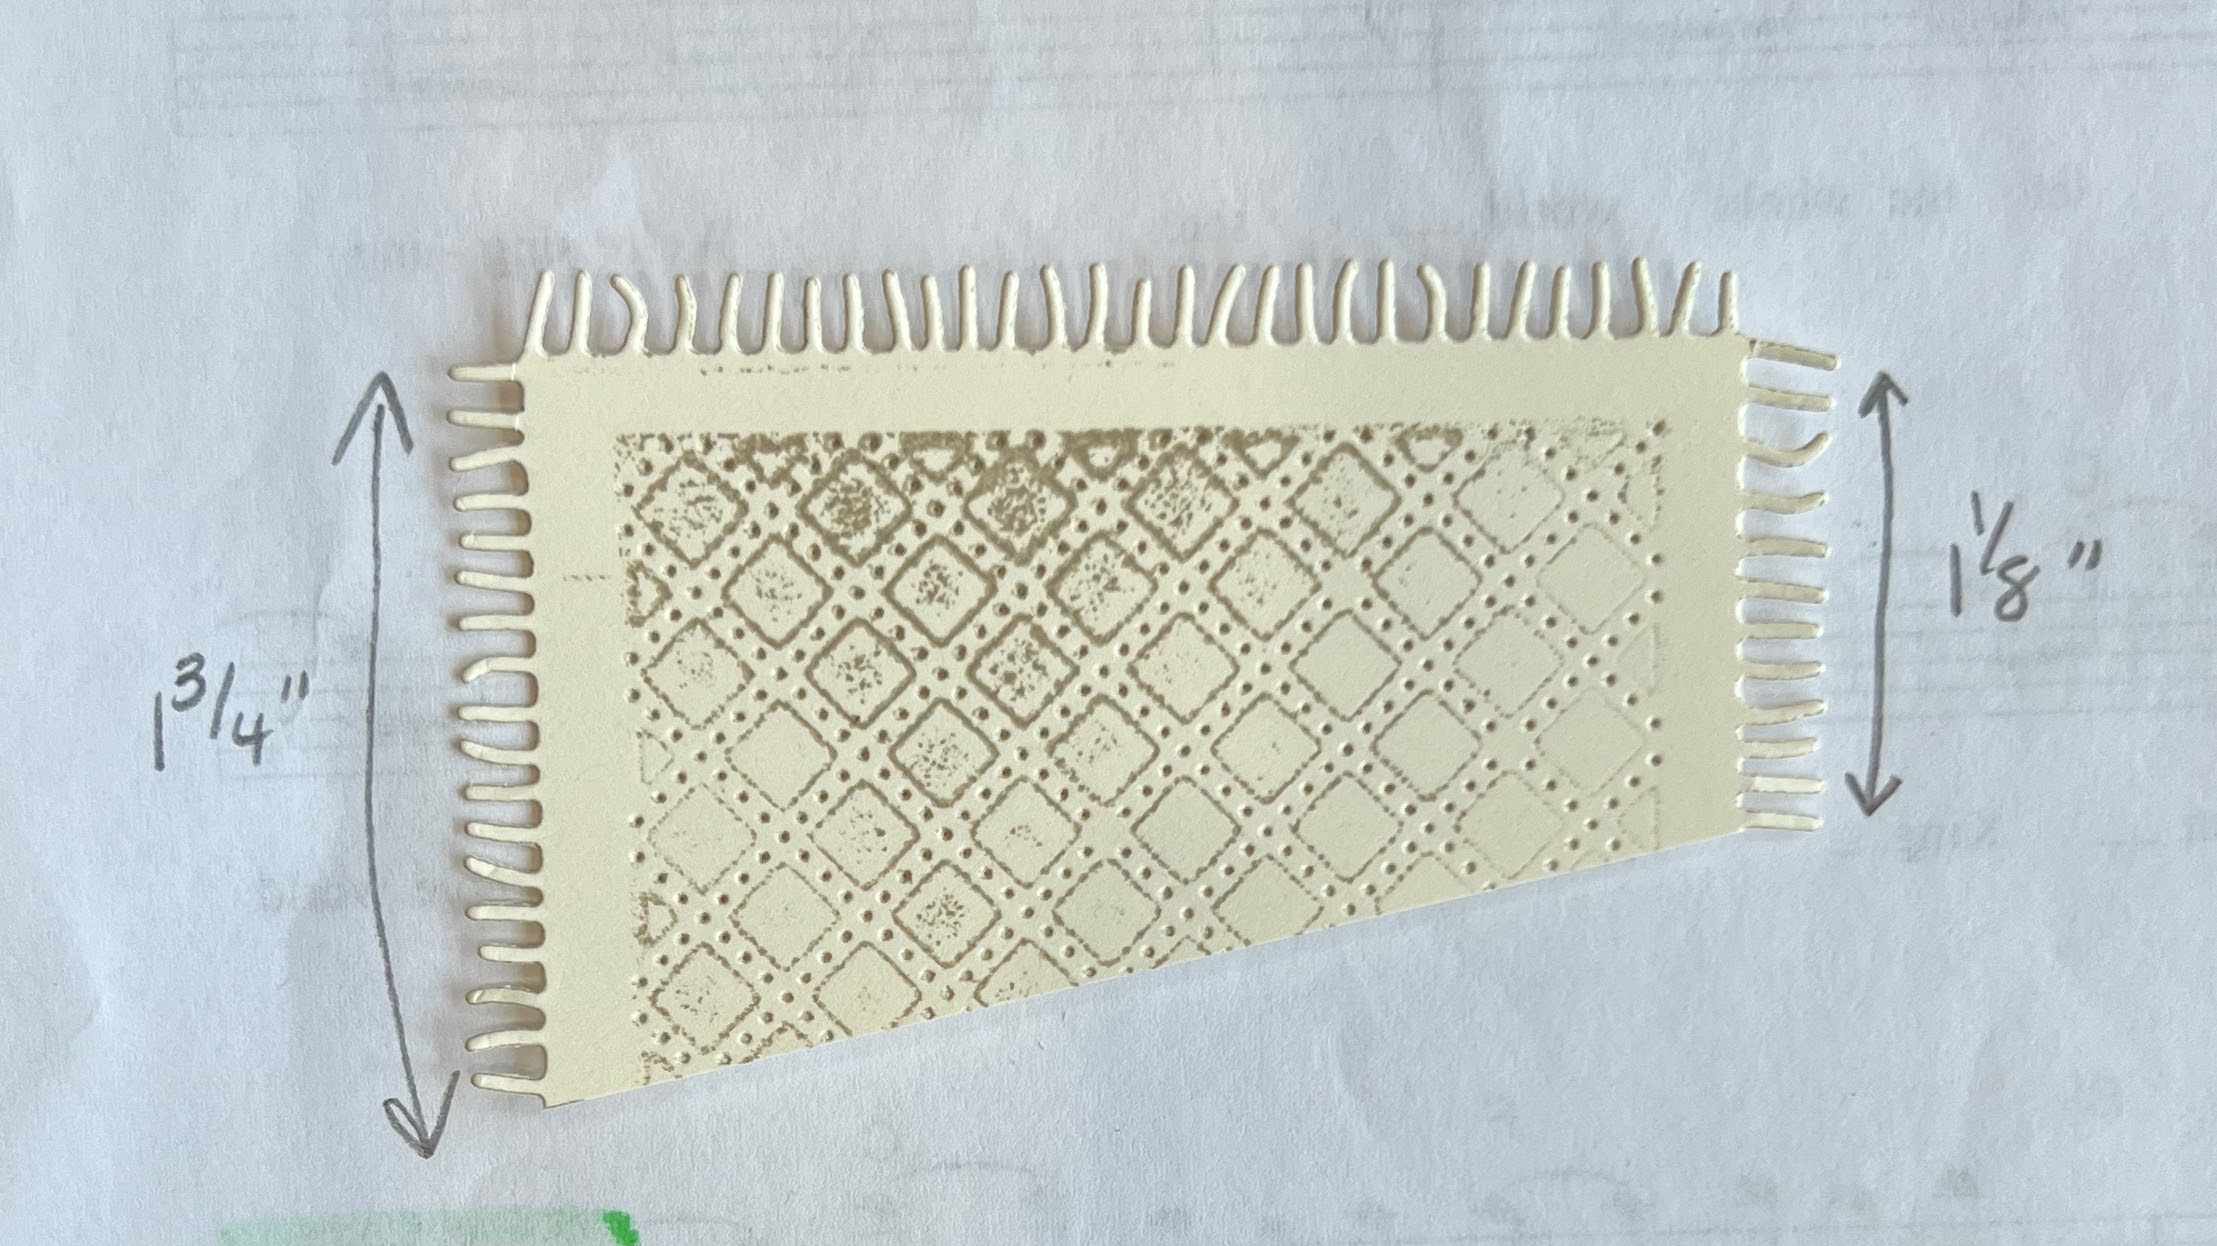
For the coaster I cut it on angle with the following measurements which gives you 2 pieces that can be used on cards:

1-3/4” on one side

1-1/8” opposite side


I stamped the Crumb Cake ink directly onto the die before cutting so that it would embed in the die cut.


I am entering this card into the Fall-Winter Coffee Lovers Blog Hop.


Thanks for stopping by!


SUPPLIES:

Paper: White, Very Vanilla, Early Espresso, Plaid Tidings  dsp(SU)

Ink: Crushed Curry, Mango Melody, Handsome Hunter, Smoky Slate, Crumb Cake (SU), Warm Buff, Doe, Gathered Twigs , Espresso (Pinkfresh Studio), Versamark

Dies: Warm & Wonderful,  Cozy Cup Coaster (The Greetery); Fishtail Flag Stax (mft)

Other: Gold embossing powder, twine (May Arts)


Framed Florets Celebrate

I needed a birthday card for a friend and I had just received Framed Florets and wanted to use it. I also had a negative piece of pink foil on my desk so I put the two together for this card.  


It's difficult to see in the picture the frame is cut from shimmer white cardstock.  


The foliage is cut from silver, vellum and Polished Pink.


Thanks for stopping by and taking a look!


SUPPLIES:

Stamps: Framed Florets (SU)

Paper: White, Shimmer White, Hibiscus Burst, silver (pti), 20221-2023 In Color dsp polished pink (SU), vellum

Ink: Polished Pink (SU)

Dies: Framed Florets, Fabulous Frames (SU)

Other: Pretty Flowers Embossing Folder, silver cord trim (SU)

Glimmer Hot Foil Plate: Illustrated Floral & Solid (Spellbinders)

Hot Foil: Pink (Spellbinders)


Tuesday, October 18, 2022

Jumbo Curiosity Round Ornament

 I got two new items in the mail on the same day and had to put them together. The Jumbo Curiosity Round Ornament die by The Greetery and the Scattered Christmas embossing folder by Spellbinders. I based my card on this one by Laurie Willison.

It's hard to see in the photo but I cut the branch with Close to Cocoa and shaded it with Early Expresso. The pine needles are cut from Soft Succulent and shaded with Handsome Hunter.


I used the Opposites Attract Holiday Hot Foil plate by The Greetery for the sentiment. You can see the shine below.


SUPPLIES:

Paper: White, Handsome Hunter, Close to Cocoa, Soft Succulent (SU), gold foil, kraft (pti)

Ink: Early Espresso, Handsome Hunter (SU)

Dies: BotaniCuts Pine Bough, Jumbo Curiosity Round Ornament (The Greetery)

Other: Red Rhinestone Basic Jewels, Sage Shadow Stampin’Write marker (SU), red twine (American Crafts), Scattered Christmas embossing folder (Spellbinders), foam tape

Hot Foil Plate: Opposites Attract Holdiday (The Greetery)

Hot foil: Matte gold (Spellbinders)


Friday, September 16, 2022

Seasonal Swirls Christmas Wreath

 I'm getting started on my Christmas cards.


The wreath on this card was inspired by Mary Deatherage.

• Die cut 1 wreath from Pear Pizzazz and 1 from each of the colors in Eden’s Garden Cotton Paper (Evening Evergreen and Soft Succulent)


• Die cut 1 wreath with stars from the silver foil


• Evening Evergreen 5-1/4 x 4"


• Gingham Cottage dsp: 4 x 2-3/4”


• Sentiment strip Smoky Slate: 3-1/4 x 1/2”

• Evening Evergreen: 3-3/8 x 5/8”


• Foam tape under dsp & sentiment


• The embossing folder must be run through twice to cover the entire Evening Evergreen piece


SUPPLIES:

Stamps: Sparkle of the Season (SU)

Paper: Evening Evergreen, Smoky Slate, Pear Pizzazz, Gingham Cottage dsp, Ever Eden Cotton Paper (SU), silver foil

Ink: Evening Evergreen (SU)

Dies: Seasonal Swirls (SU)

Other: Wintery 3D embossing folder, silver cord (SU), foam tape


Friday, August 19, 2022

Jumbo Curiosity: Butterfly

My daughter visited with her family and we had lots of time to craft together. This is my first card with the Jumbo Curiosity: Butterfly die by The Greetery.


After playing with the butterfly I figured out it works best to die cut and then ink blend using the stencil. I couldn't get it lined up the other way around.  I recently learned about Foundry Wax and thought it would look cool on the butterfly wings. I used the the end of a paint brush to apply the dots. I also splattered some of the gold onto the background but it is hard to see.


For the wood slice, I inked up the center part of the die with Early Espresso before die cutting so that the lines would show up better. After cutting I inked blended the outer ring with Vintage Photo DOX.

Supplies used:

Stamps: Sketched Wildflower Frame, Sentiment Suite: Birthday (The Greetery)

Paper: White, Kraft

Ink: Crumb Cake, Early Espresso, DOX (Carved Pumpkin, Crackling Campfire, Festive Berries, Barn Door, Vintage Photo)

Dies: Jumbo Curiosity: Butterfly, Wood Slices, Sentiment Suite Basics (The Greetery)

Other: Foundry Wax-Gilded (Tim Holtz/Ranger)


Topsy Turvy Cake

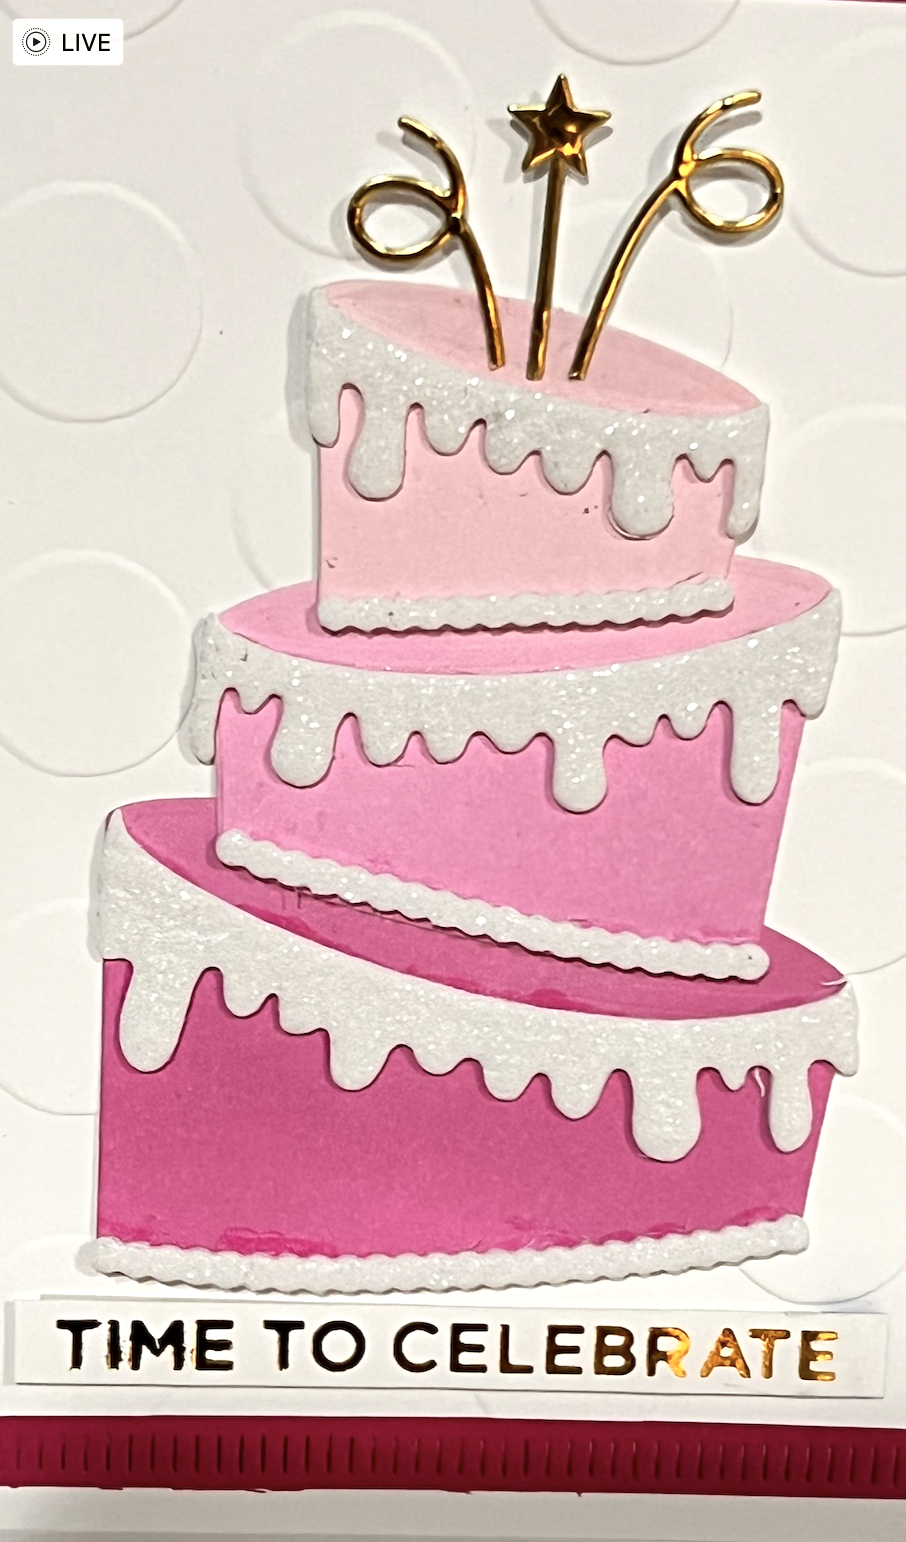
 I have a thing about cake stamps & dies. I love them. So when I saw this funky die set it went right on my wishlist. When it came back in stock I immediately ordered it. This card is for a couple at church celebrating their anniversary next week.


The cake has 5 layers to choose from and I went with 3 of them.  I ink blended each layer with distress oxide. From top to bottom I used: Spun Sugar, Kitsch Flamingo & Picked Raspberry. To add some bling I cut the frosting out of a Pop-Up Die Cutting Glitter Foam Sheet in white  by Spellbinders. The sentiment is hot foiled.


Supplies used:

Paper: Melon Mambo (SU), gold foil

Ink: DOX (Picked Raspberry, Kitsch Flamingo, Spun Sugar)

Die: Crimped Frames (The Greetery)

Other: Big Dots embossing folder-ret (SU), Pop-Up Die Cutting Glitter Foam Sheets-white (Spellbinders) 

Hot Foil Plate: More Sentiments (Spellbinders)

Hot foil: Shiny gold (Spellbinders)


Saturday, December 11, 2021

Red Truck Christmas

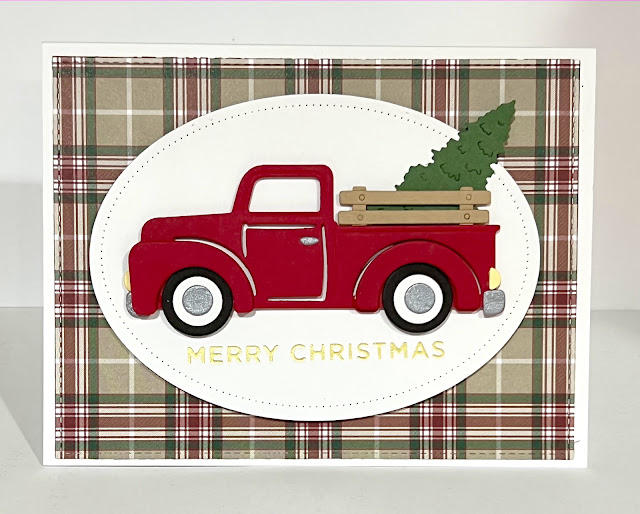
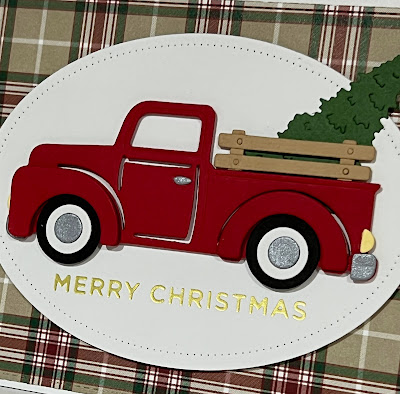
 I love this little truck. It's one of those things when you see it you know you "need" it. It's called Holiday Haul by Spellbinders.  It has lots of tiny bits that are kinda fiddly but I love how this card turned out. It's late afternoon and raining outside so sorry that the photo is a bit darker than the actual card.


Everything is straight forward. The oval is popped up on foam tape. The truck's fenders are popped up and the whole truck is popped up on the oval.

The sentiment is hot foiled with matte gold foil.


Here are the supplies that I used:

Paper: Real Red, Basic Black, Garden Green, Creamy Caramel-ret., Plaid Tidings 6x6 dsp-ret. (SU); brushed silver, Lemon Tart (pti)

Dies: Holiday Haul (Spellbinders); Stitched Rectangles (mft); Nesting Basics: Ovals, Nesting Basics: Pierced Ovals (pti)

Hot Foil Plate: Holiday Sentiments Series 2 (Spellbinders)

Hot Foil: Matte gold (Spellbinders)

Other: foam tape


Saturday, September 25, 2021

Using Up Leftovers

 I had some pieces leftover on my table from 2 other cards and so I started playing them and put together this card.

My starting pieces were the tree and the 2 dsp pieces. I added a 4 x 5-1/4" piece of Handsome Hunter which I embossed with Tasteful Textile embossing folder. I also embossed the smaller of the 2 pieces of dsp which is directly behind the tree. 


The hardest part was the sentiment. I didn't want to cover up the tree too much and I didn't have a die that I felt worked so I took a stitched rectangle die the correct width and cut out a piece of white cardstock. Then I flipped the piece 180 degrees and carefully matched up the sides and cut it again to a size that fit the sentiment vertically. It took me 4 tries before I liked the result :-). I also added Wink of Stella to the snow on the branches but I guess I did that after taking the picture. It sparkles it up.


Thanks for stopping by!

SUPPLIES:

Stamps: Christmas to Remember (SU)

Paper: White, Handsome Hunter-ret, 2021-2023 In Color dsp, Tidings of Christmas dsp (SU)

Ink: Evening Evergreen (SU)

Dies: Woodlands (Tim Holtz-Sizzix), Stitched Rectangles (mft)

Other: Tasteful Textile 3D embossing folder, Dimensionals, Liquid Applique (Marvy), Wink of Stella on top of the applique, Wink of Stella


Wednesday, September 22, 2021

Mystery Stamping with Jaimie

 I am so far behind in posting my cards but here is one that I made yesterday with my SU upline & team. She called it Mystery Stamping. We were given the basic supplies & paper dimensions that we needed but she did not tell us the final sketch/layout of the card. It was fun to see what everyone came up in the end. Here is my card.


It's a pretty straight forward card.  I recently bought some liquid appliqué and I wanted to try it out so I added it to the tree branches to look like snow.  It's interesting stuff. You apply it, let it dry & then heat it with a heat tool. When it gets hot it puffs up. Very fun!


Dimensions of cardstock pieces:

White: 3-5/8 x 4-5/8”

Cherry Cobbler: 2-1/2 x 4-1/2”

dsp: 1 x 4-1/2”


Thanks for stopping by!


Here are the supplies that I used:

Stamps: Christmas to Remember (SU)
Paper: White, Kraft (pti),  Handsome Hunter-ret, Cherry Cobbler, Tidings of Christmas dsp (SU)
Ink: Evening Evergreen (SU)
Die: Woodlands (Tim Holtz Sizzix), Seasonal Labels (SU)
Other: Wintry 3D embossing folder, Holiday Rhinestone Basic Jewels, Rhinestone Basic Jewels (SU), Liquid Applique (Marvy), Foam Tape, heat tool


Tuesday, May 25, 2021

Hand-Penned Birthday

This card is for a young woman new to our church. 

I recently ordered Mint Macaron ink but apparently did not order the cardstock. It turns out that PTI Mint Julep is a pretty good match. This card is quite a mix & match of sets and took me a long to get to figure out. It is busier than I usually do but I am going to go with it.


I am using the piece of Pale Papaya sheer vellum that I cut from my previous post's card. It's getting late in the day so I didn't have enough light to capture the simmer very well.


Thanks for stoppimg by!

SUPPLIES:

Stamps: Pansy Patch (sentiment - SU)

Paper: White, Blushing Bride, Garden Green, Hand-Penned dsp, Pale Papaya Shimmer Vellum (SU); Mint Julep (PTI)

Ink: Mint Macaron (SU)

Dies: Scalloped Contours; Penned Flowers (SU); Shape Shifters: Oval 2 (PTI); Hemstitch Rectangles (Spellbinders)

Other: Foam tape


Color & Contour

 I finally received the Color & Contour set. I have seen so many cute cards out there and so decided to case this one for my first card. Making it easy on myself :-)

The new SU In Colors this year are really pretty but I have so many ink pads from past years that I went looking to see if I had anything close to the Pale Papaya used on this card.  I bought the cardstock so that I could match and I came up with Apricot Appeal. I think it is very close in color so I am going with it. 


For the background scallop piece I used the largest Scalloped Contours die and a piece of the new Pale Papaya Shimmer Vellum. It has a real pretty shimmer to it.

The sentiment is from Sentiment Suite: Thinking of You from The Greetery. I added some fun foam underneath the white panel to give it some depth.


One more thing. I couldn't bear to waste all the shimmer vellum underneath the white panel so I cut out a Hand-Penned Petals flower. It will be used on another card. No one will ever know that it is missing from this card. Well, almost no one :-)


Thanks for stopping by!


SUPPLIES:

Stamps: Color & Contour (SU); Sentiment Suite: Thinking of You (The Greetery)

Paper: White, Black, 2021-2023 Pale Papaya  Shimmer Vellum (SU)

Ink: Basic Gray, Apricot Appeal (SU), Versamark

Dies: Scallop Contours (SU); Sentiment Suite Basics (The Greetery)

Other: white embossing powder, fun foam


Friday, May 21, 2021

Masculine Birthday Card

 I have quite a few birthdays coming up where I need a masculine card. Those are always hard for me. I looked through my stamps and found a really old set called Classic Convertibles. Seemed like a good choice for a guy card.


The only tricky thing about this card was the piercing. I cut a piece of Very Vanilla to 5-1/2" x 4-1/4" and then used the largest Nesting Basics: Pierced Rectangles die by PTI. Next I stamped the car close to the left edge. I carefully placed the die back into the piercing holes but moved it so that the right side had the same width as the left side and put it through my Big Shot only far enough to pierce the right edge where I wanted it. Then I pulled it back out and cut off the right side just past the new pierced edge. Did that make sense?


I dug through my hoarded stash and found some very, very old Hodgepodge Hardware by SU. It seemed like a good masculine accessory to use.  Do you all hoard your stuff like me? I need to just use it!!!


SUPPLIES:

Stamps: Classic Convertibles (SU)

Paper: Very Vanilla, Cinnamon Cider, Cajun Craze (SU)

Ink: Cinnamon Cider, Cajun Craze marker (SU)

Dies: Nesting Basics: Pierced Rectangles (pti)

Other: Tasteful Textile embossing folder, Linen Thread, Hodgepodge Hardware Antique Brass (SU), foam tape, glue dot


Wednesday, May 12, 2021

Hand-Penned Petals

 I have new SU ink & stamps to play with. I love all the Hand-Penned Petals cards that I have been seeing and I had to get in on the action. There are many firsts on this card, for me at least. 

I started by embossing a 4x5-1/4" piece of Sahara Sand with the Dainty Diamonds embossing folder.


Then I dic cut the the 2 parts of the flower in white. I liked a color combo I have been seeing of Misty Moonlight, Mint Macaron & Pale Papaya. I do not have Pale Papaya but I do have a the retired Apricot Appeal which looks close enough to me. For the Misty Moonlight & Mint Macaron I stamped off one time before stamping on the flower. I cut a piece of Apricot Appeal card stock with the Penned Flowers die and layered it under the flowers.


Next I stamped and then die cut a sentiment from The Greetery with Versamark, embossed it with some Walnut Stain Distress embossing Glaze from Tim Holtz and attached with a tiny staple.


This set is so pretty and I look forward to making more cards with it.  Thanks for stopping by!


SUPPLIES:

Stamps: Hand-Penned Petals (SU), Sentiment Suite: Thinking of You (The Greetery)

Paper: White, Apricot Appeal-ret (SU)

Ink: Apricot Appeal, Mint Macaron, Misty Moonlight (SU); Versamark

Dies: Penned Flowers (SU); Sentiment Suite: Basics (The Greetery)

Other: Dainty Diamonds Embossing Folder (SU); Walnut Stain Distress Embossing Glaze, Tiny Attacher (Tim Holtz); fun foam


Wednesday, May 5, 2021

Tiny Just Mason Around from The Greetery

I got my order from The Greetery and Betsy had included a little freebie in honor of her 2nd anniversary. It is a very cute, but tiny, stamp of a her Mason jar set and a bouquet of flowers. My daughter hasn't received her order yet so I got to work and made a quick card to show her.

It is a 2 piece set so the jar was easy to stamp. The flowers were a bit more challenging.  I tried a couple different things but ended up stamping the bouquet in Soft Stone and then using the fine tip end of markers to go over it and color in the parts of the bouquet. It is a bit messy because I did it fast but I do like the results.


After doing the flowers I flicked some Early Espresso around the bouquet, added some clear Nuvo drops and tied some twine around in a bow.


I think that next time I might try die cutting some mini flowers to add to the jar. I'm thinking my new Alphabuds Bold might do the trick :-)

SUPPLIES:

Stamps: Tiny Just Mason Around (free thank you set from The Greetery)

Paper: White, Lemon Tart, Lemon Tart Pattern Pack (pti)

Ink: Soft Stone, Aqua Mist (pti)

Dies: Border Basics: Rectangle, Border Bling: Tin Stitched (itp); Stitched Rectangles Stax die-namicss (mft)

Other: SU markers (Always Artichoke, Early Espresso, Crushed Curry, Wisteria Wonder, Pale Plum, Blushing Bride); Linen thread (May Arts), spritzer, Clear Nuvo Crystal Drops


Friday, November 13, 2020

Noel Stag

Working on my Christmas cards. I knew that there was a stag challenge out there and I was going to enter this until I realized it was a CAS + stag challenge. This wasn't really hard but there are a lot of layers so I guess I will have to make another go at it. 


Thanks for stopping by and hope to see you soon with a CAS stag card :-)


SUPPLIES

Paper: White, Kraft, Handsome Hunter, Vintage Cream, Wrapped in Plaid dsp (SU)

Dies: Nordic Frames (mft); Noel Word (Lil Inker Designs)

Other: Tasteful Textile embossing folder (SU)


Monday, October 5, 2020

Hello Lovely

 I just got this Hello Lovely set from Concord & 9th. I combined it with Stacked Decorative Edges dies from Spellbinders to create this card.

I masked off the die cut area and stamped the flowers. The images are a very loose style and you can't really go wrong no matter how you stamp them. I think that next time I will stamp & die cut the flowers and then overlay them over the decorative border but I like this version for my first card with this set. 


Have a great day!


SUPPLIES:

Stamps: Hello Lovely (Concord & 9th)

Paper: White, Summer Sunrise (pti)

Ink: Black, Harvest Gold, Summer Sunrise, Orange Zest, Melon Berry, Spring Moss, Olive Twist

Dies: Stacked Decorative Edges - Small dies of the month May 2020 (Spellbinders)


Monday, September 28, 2020

Quick Birthday Card

 I needed a fast birthday card so I cased this cute card for my brother's birthday.  I didn't have the cupcake stamp set so I used Birthdays Take the Cake instead.


I die cut the words from each of the colored papers and also one time from white. I backed the colored letters in white for a tiny bit of elevation and then used the negative space in the white sheet to place the words on the pattern paper. I colored the cake with the alcohol markers.


You can see the shine in the gold letters better in this photo.


This card came together really quickly since the sentiment is all one die. 


SUPPLIES:


Stamps: Birthdays Take the Cake (mft)

Paper: White, Aqua Mist, Tropical Teal (pti), gold (not sure what this is), Party Plaid Paper Pad  (mft)

Dies: Big Birthday Wishes Die-namics, Birthdays Take the Cake (mft)

Other: Spectrum Noir Tri-Blend markers


Saturday, September 26, 2020

Piece of Cake For a Friend

Here is a birthday card I made for a friend at church.

I just got some Tim Holtz distress oxide glazes and I wanted to try them out. I die cut the cake and then tapped Versamark all over. Then I sprinkled Fossilized Amber glaze all over and heat set it. So the cake is really shiny but you can't see that in the picture.

I ink blended some Antique Linen distress oxide ink all around the perimeter of the circle and the cake is popped up on foam tape. I used 2 colors of yellow Zig markers to color the flame on the candle.


Thanks for stopping by to look at my card :-)


SUPPLIES:

Stamps: Birthday Greetings (mft)

Paper: White, pink (pti), Petite Gingham paper pad, Positively Preppy paper pad (mft)

Ink: Black, Antique Linen Distress Oxide, Veramark

Dies: Piece of Cake die-namics, Inside & Out Stitched Circles (mft); Scallop Stackers: Large (pti)

Other: Fossilized Amber Distress Oxide Glaze (Tim Holtz), Blending brush, foam tape, Zig markers


Saturday, September 19, 2020

1st Christmas Card Down

 I've been wanting a poinsettia die for a long time and when Concord & 9th just released their version I decided that was the one. It arrived in the mail today and I had to play. So here is my first Christmas card.


It's hard to see in the picture but there is Wink of Stella on the poinsettia leaves which give them a bit of sparkle.


The poinsettias come together quickly and look prettier in real life than my pictures show. Thanks for stopping by.

SUPPLIES:

Paper: Cherry Cobbler, Handsome Hunter, Confetti White (SU); New Leaf, Lemon Tart, Luxe Gold (pti)

Dies: Fresh Cut Florals Edition 4 (C9); Big Basics: Merry Christmas, Scallop Stackers: Small (pti)

Other: Bright Gold, Ebony Black (Nuvo Crystal drops), Clear Wink of Stella


Related Posts Plugin for WordPress, Blogger...