Friday, January 31, 2014

GO SEAHAWKS!


Well it was unintentional but my subconscious must have been thinking Seahawks when I made this card. I am from the greater Seattle area and we are so excited that they are in the Super Bowl!! Well on to the card.

I watched a video this week by Jennifer McGuire and she used verdigris embossing powder on embossing paste. It reminded me that I bought some verdigris from Stampin'Up years ago.  There is another video by Shari Carroll which I've been itching to try where she used acetate to raise words up off the card. So I thought I could combine several techniques and this week's CAS(E) This Sketch challenge for my card.  Since I just took the Stenciled Online Card Class this fits right in with that too.


I tried to get a picture of the acetate so that you could see the layers but it was hard to get it to show up. I used the 2 way glue pen to adhere the sentiment to the acetate.


Here you can see the colors of the verdigris embossing powder. I sprinkled the powder on the spackling paste while it was still wet but waited for it to dry before heating it up with my heat tool.


Thanks for stopping by today! GO SEAHAWKS!!!


p.s.  I just saw that OWH is doing a 3-day Card Bowl Challenge and today's challenge is to make a masculine card that reflects your choice of team to win. Well I think my card fits this so I'm entering it in the challenge.


SUPPLIES:
Stamps: none
Paper: White (PTI), Night of Navy (SU), DSP by SU
Ink: none
Other: Thanks On a Line die (SSS), Tim Holtz layering stencil "Bubble", light weight spackling paste (Ace Hardware), Verdigris embossing powder (SU), acetate, foam tape, Zig 2 way glue pen

Monday, January 27, 2014

Online Stenciled Class Day #3 and 2 Challenges


One of the challenges on day 3 of the Stenciled Online Card Class was to add color to embossing paste.  I'm using light weight spackling paste and I added 1 drop of Regal Rose (SU) reinker to a blob of paste. It gave me a nice pale pink color. I spread that over the SSS Peppermint Stripes stencil.  I cut my tag from some vellum that I had and ran it through my Big Shot using the Dots Cuttlebug folder.  For my main image I stamped it once in Smokey Shadow ink and cut it out with a circle Nestability. I stamped it a second time in Regal Rose ink and cut out the heart by hand. I die cut a double ended flag in Regal Rose and embossed the sentiment in white. I put it all together with dimensionals between each layer. 


This card is also for challenge #25 at CAS on Sunday to make a Valentine/Love card and the new Card Concept Challenge #2 to add texture on your card. I've used embossing paste in my Clean & Layered style card.


I'm having fun using my stencils in new ways. Thanks for stopping by today!


SUPPLIES:
Stamps: Tag-its #11 (PTI)
Paper: Stampers Select White (PTI), Regal Rose (SU)
Ink: Smokey Shadow (PTI), Regal Rose (SU)
Tools: Circle Nestabilities, Dots embossing folder (Cuttlebug), Grand Ampersand flag die and Tag Sale #5 die (PTI), Peppermint Stripes Stencil (SSS)
Other: Bakers twine, dimensionals, Versamark ink, white embossing powder (SU), sequins (Avery Elle), light weight spackling paste (Ace Hardware), Glue Dots, dimensionals (SU)


Edited 2/5:  My card was chosen by Deanna as one of the winners in the Card Concept Challenge #2. Yippee!!!


Saturday, January 25, 2014

Online Stenciled Class Day #1 and Papertrey Ink January Blog Hop


Papertrey Ink is having their January Blog Hop today. The challenge is to use pink on your project and since I haven't made my Valentines yet today is the day.


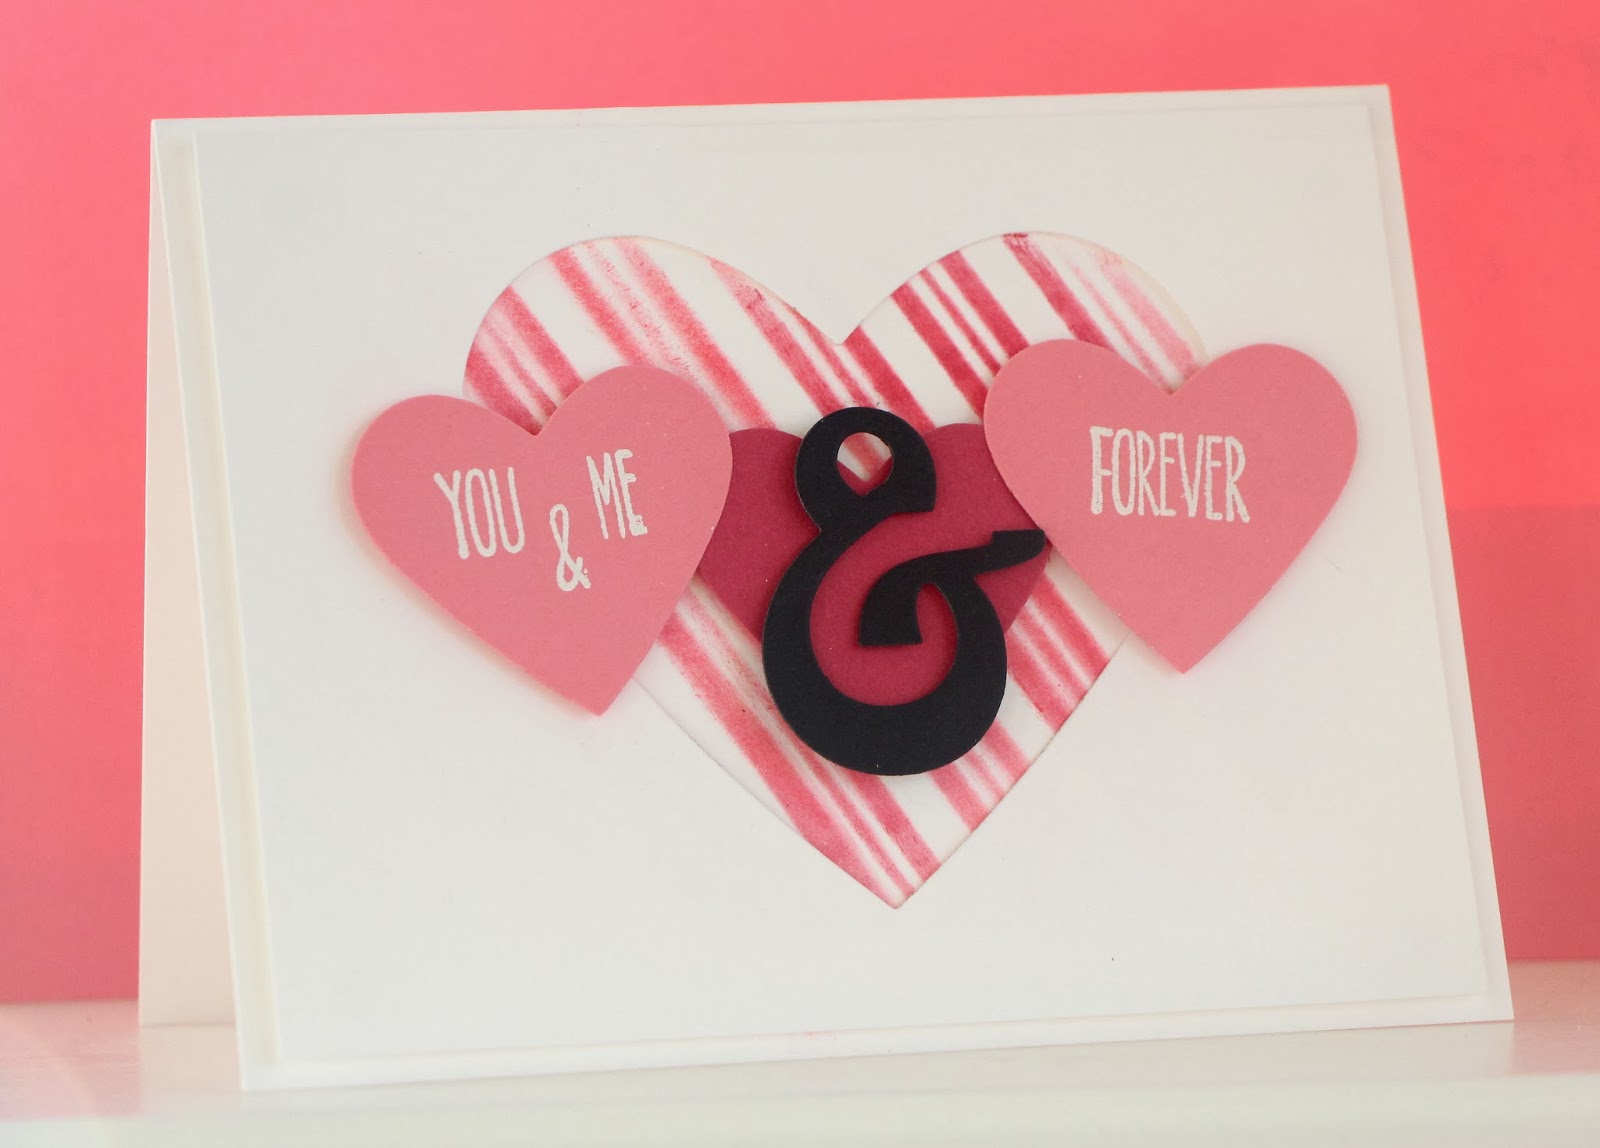
I'm also taking the Online Card Class "Stenciled" and this is my card for day 1 of the class. I die cut the heart from the top white panel so that I would know where to sponge underneath. I used a blending tool to sponge Rose Red & Regal Rose inks on the SSS Peppermint Stripes stencil. I cut one heart from Rose Red & popped it up on dimensionals. The die cut ampersand is also on dimensionals. Lastly I embossed the sentiments to the side hearts using white embossing powder.


Well I'm off to do another project.  Thanks for stopping by!


SUPPLIES:
Stamps: Grand Ampersand (PTI)
Paper: Neenah Solar White, Rose Red, Regal Rose, Basic Black (SU)
Ink: Rose Red, Regal Rose (SU)
Tools: Peppermint Stripes stencil (SSS), Grand Ampersand die (PTI), Heart Framelits (SU), blending tool
Other: Dimensionals, Versamark ink, White embossing powder & Embossing Buddy (SU)

Wednesday, January 22, 2014

What's Perking?: Card Concept Challenge #2 and BIC #46


Challenge #2 at The Card Concept is to use texture.  I'm a CAS kinda girl and I guess this card falls into the Clean & Layered category.  I also got to use my new Breakfast Club set for the Be Inspired Challenge.


Here you can see some of the detail. I die cut one of the speech bubbles and layered some DSP behind it. I embossed the sentiments with white embossing powder.  The coffee cup was stamped on the card, stamped again on another piece of white card stock and then cut out & popped up on dimensionals. A few sequins finished it off. I hope that's enough texture. I think that I need to go do a card with embossing paste. I haven't used it in a while and it sounds like fun on a gray Pacific NW day :-)


The Challenges:


Thanks for stopping by! Have a great day!!


SUPPLIES:
Stamps: Breakfast Club (TAWS)
Paper: White (PTI & Neenah Solar White), Tempting Turquoise, Real Red, Summer Smooches DSP (SU)
Ink: Onyx Black (Versafine), Daffodil Delight & Tangerine Tango markers (SU)
Other: Versamark pad, white embossing powder (SU), Say What dies (MFT), sequins (Avery Elle), dimensionals (Recollections)


Edited: 1/31

Wahoo!  My card was chosen as one of the Be Inspired Challenge Favorites!


Tuesday, January 21, 2014

Titus is 11 Months

This card was for my cutie pie grandson Titus who is now 11 months old. ,


I tried to copy what I've seen others do by adding Glossy Accents over the number 11 to give it shine and dimension. Mostly it just looks blobby or maybe it's gloopy. Whatever it didn't turn out like I'd hoped.  I guess I need more practice on this technique :-)  After attaching everything I thought it didn't seem festive enough so I squeezed my ink pads together to get ink in the lids, I took a paint brush full of water and swished it around in the lid and then tapped the brush over my card to spritz on some color.  The little puffs of smoke behind the truck are really clouds and the dirt was made using the Itty Bitty Backgrounds set.

Happy 11 month birthday Titus!


SUPPLIES:
Stamps: I Dig You, Itty Bitty Backgrounds (SU),  Little Hot Rod, Stylish Sentiments: Birthday, Birthday Style (PTI)
Paper: Chocolate Chip, Whisper White (SU)
Ink: Chocolate Chip, Pool Party, Crushed Curry, Old Olive, Basic Black marker (SU), Versafine Onyx Black
Accessories: Silver brads, White Baker's twine (SU), dimensionals, Stylish Sentiments: Birthday die (PTI), 1/8" circle punch, scotch tape

Friday, January 17, 2014

CTD275 and More Dots

I hope your weather is better than here in the Pacific NW. It's been pea soup fog for the last 2 days. I'm pretty tired of the gray!!  So when it's yucky outside it's a good time to hit the craft room.  Here's a simple one layer card made for the Color Throwdown Challenge which also has dots for the CAS-ology Challenge.  Since I have a cold one layer was about all I could handle :-)


Thanks for stopping by. Have a great weekend!


SUPPLIES:
Stamps: Many Dots (Hero Arts), Birthday Bash Sentiments (PTI)
Paper: Neenah Solar White
Ink: Crumb Cake, Wisteria Wonder, Garden Green, Almost Amethyst (SU), Onyx Black (Versafine)
Accessories: Enamel dots (MME and Teresa Collins)

Thursday, January 16, 2014

Stamping with my Dad


My dad has been intrigued by all the cards that he & mom have gotten from me over the years.  He wanted to make a card for his sister so we had a stamping lesson this afternoon.  He looked through my Pinterest file and found a card that he liked. We modified it to use stamps that I have and to make it bit easier for his first card.  Also, you can't see it all in the picture but we ran the white layer through my Big Shot using the PTI linen impression plate. I think that he did a great job!

Supplies:
Stamps: Bigger Blooms, Turning a New Leaf (PTI)
Paper: Whisper White, Melon Mambo (SU)
Ink: Melon Mambo, Only Orange, Going Gray (SU), Versafine Onyx Black
Other: Dimensionals, Linen Impression Plate (PTI)


p.s.  I should also have mentioned that my dad is 84 years old :-)

Wednesday, January 15, 2014

PP178 & CAS-ology 78 Dot

Hi! Back in the stamp room yesterday and I got in 2 challenges - The Paper Players color challenge and CAS-ology's challenge to use dots.


You can't see it well in the picture but I went over the word Birthday with a Gelly Roll "Stardust" gel pen. It gives it a glittery look in real life.


That's it for today. Back tomorrow with a card by my dad :-)  Yes, not for my dad but made by my dad.


SUPPLIES:
Stamps: Background Check (TAWS), Think Big Favorites #12 (PTI)
Paper: Neenah Solar White, Coastal Cabana (SU)
Ink: Primrose Petals, Pear Pizzazz, Coastal Cabana, Crushed Curry markers (SU), Versafine Onyx Black
Other: Gelly Roll "Stardust" gel pen, Pool Party Baker's twine (SU), dimensionals

Monday, January 13, 2014

Sympathy

Well we are moved into our new house but I can't say that the unpacking is done yet.  I'm finally making progress on my new craft room though. Enough that I was able to stamp today and make some sympathy cards that I unfortunately needed for my SIL and his family.


Here is the first one which is for my SIL and so I wanted a masculine card. I don't think that you can see it well in the picture but the white panel is up dimensionals.


SUPPLIES:
Stamps: Off the Grid (SU), Think Big Favorites #3 (PTI)
Paper: Basic Black, Basic Gray, Whisper White (SU)
Ink: Smoky Slate (SU), Versafine Onyx Black
Accessories: Enamel dots (MME), dimensionals


The second one is for his family. This card is cased from a card by Maureen Merritt. Her card is the reason that I bought the Peaceful Wildflowers stamp set.  To do the background I made a mask by cutting a piece of cheap white card stock the same size as the stamped panel. I then die cut an oval in the exact position that I wanted the background and then taped this piece to my good paper using removal tape. I inked up the background stamp and stamped through the oval mask onto my paper. I removed the mask and stamped the flower images and the sentiment. Now that I have the mask made it will be easy to make more of these one-layer cards.


SUPPLIES:
Stamps: Peaceful Wildflowers (MFT), Sanded, Teeny Tiny Wishes (SU)
Paper: Whisper White (SU)
Ink: Soft Sky (SU), Versafine Onyx Black
Other: Dimensionals


I looking forward to being in my stamp room more frequently now. Thanks for stopping by today!

Related Posts Plugin for WordPress, Blogger...